Showing posts with label recipe. Show all posts

Pumpkin Quinoa Porridge

Sunday, September 22, 2013

  • I like the idea of oatmeal but in all honesty, I'm not much of an oatmeal person. There's just something about the texture that I find kind of gloppy and unappealing. But curling up with a warm bowl on a cool morning is, and so I'm always on the lookout for breakfast cereal substitutions that will give that cozy effect. In the past, we've really enjoyed a hot cereal made from almond meal, but lately, our go-to is a kind of quinoa porridge that we adapted from this recipe. The texture is amazing, it doesn't get soggy or mushy, and it's packed with protein which is a nice start to your day. 
  • Quinoa is also very adaptable to all different kinds of flavors, so we've been experimenting with peanut butter porridge and a version with apples, but with fall in the air, it's all about pumpkin so that's what we've been using most frequently. 
Ingredients: 

1 cup uncooked quinoa
1 Tbsp butter
1.5 cups water
1/2 cup pumpkin (or up to 2/3 cup, if you want a little more oomph)
1 tsp cinnamon
1/4 tsp nutmeg
1/4 tsp ginger
1/2 tsp vanilla
3 Tbsp brown sugar
1/4 to 1/2 cups milk (we used soy)

  • Directions: 
Soak the quinoa in a bowl of water for 5-10 minutes, rinse, and drain. Transfer the quinoa to a saucepan with 1.5 cups cold water. Bring to a boil for one minute, cover, reduce heat and simmer until the quinoa is done (about 10 minutes, or when a little "tail" appears on the quinoa). 

Remove from heat, add the butter, pumpkin, spices, vanilla, and sugar. Stir in milk until you reach your desired level of creaminess. Serve warm, with caramelized apples and more cinnamon on the top or a drizzle of maple syrup. Yum. 


When people have dinner at our house, they always wonder why there's no salt or pepper in our shakers. This is why. 

Happy Monday!

Banana Pudding à la Anouk

Thursday, September 5, 2013


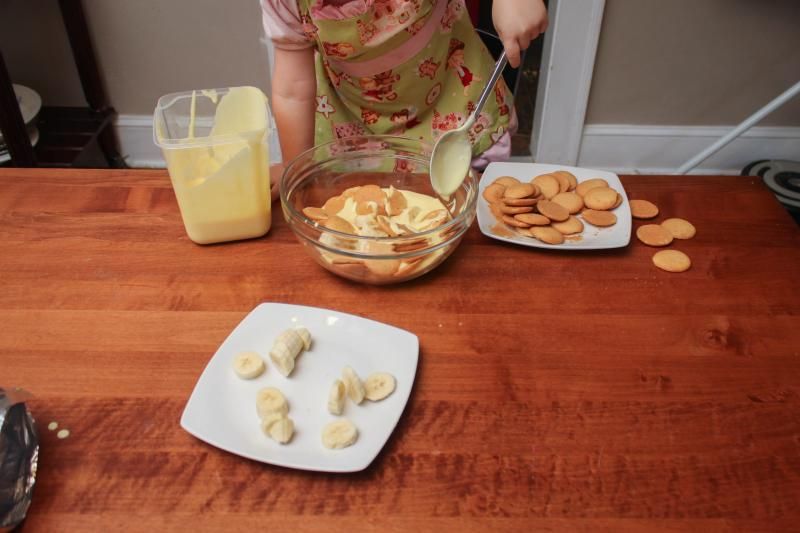
Lately, Anouk's most-often uttered phase is, "I do it myself!" She says it during bath time, when she gets dressed, when we return books to the library, and most of all, when I ask her if she wants to help me cook. Because I have an inquiring mind, I started to wonder, what WOULD happen if I let a not-quite-two-and-a-half-year-old cook something -- all by herself? Then I pulled out all of the ingredients for banana pudding and decided to find out. Because of A's milk allergy, our version of this pudding is dairy free (hooray!).

Ingredients:

1 package instant vanilla pudding
1.5 cups coconut milk
1 box vanilla wafer cookies
3-4 sliced bananas
Coconut whipped cream

Directions:

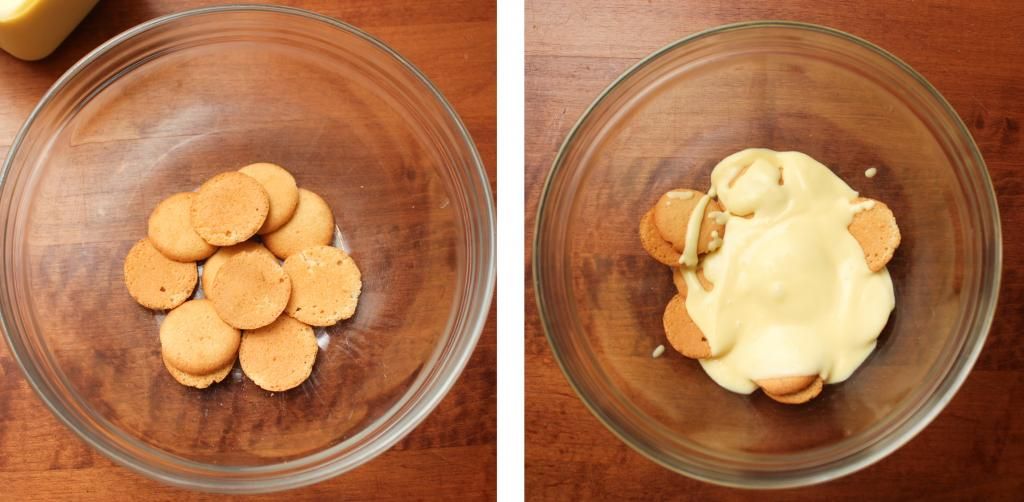
Follow the directions on the back of the instant pudding box to prepare the pudding. The trick of using coconut milk for this is to 1) use full fat coconut milk, the stuff in cans as opposed to the cartons, and 2) to use a half a cup less than the package calls for. It should set up nicely, but if it's too thick, you can add more milk, a little at a time, to think it out. Put a layer of cookies in the bottom of the bowl, follow with a layer of pudding and a layer of sliced bananas. Repeat. Serve with whipped cream on top.


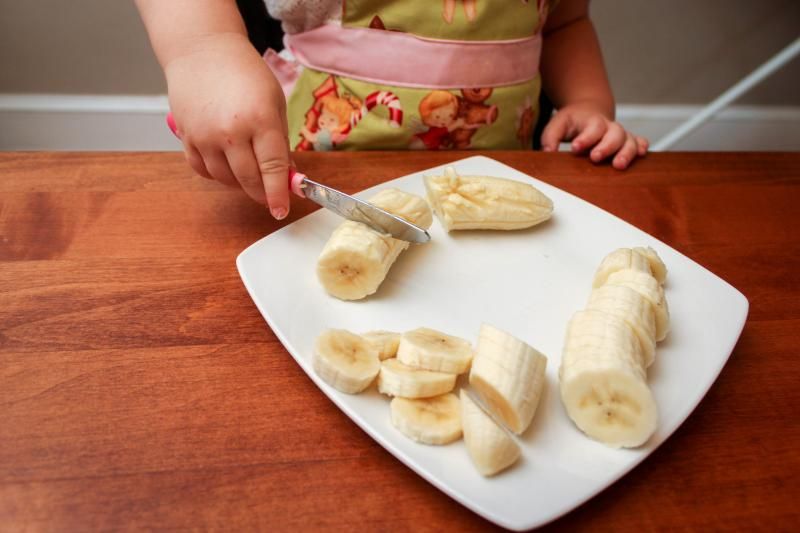
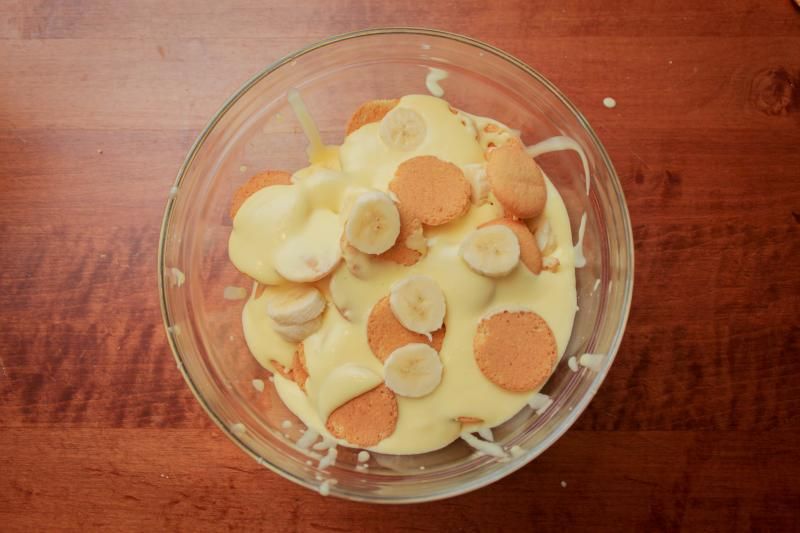
I measured out the milk for the pudding and helped A. stir the lumps out. I also sliced some of the bananas and gave her a general overview of the project. But other than that, Anouk assembled this recipe on her own, all by herself.

The end result is a little pudding-heavy, and several of the banana slices and a bit more of the cookies went into her mouth instead of the bowl. Oh, and our carefully mixed up coconut cream had a tragic accident with the floor, so we were sadly without delicious (non)dairy topping this go-round. But she was so happy with her creation that I'm deeming the project a full-blown success.

Tastes like victory!


Tahini Halawa

Tuesday, August 13, 2013


Halawa, or halvah, is a traditional Middle Eastern sweetmeat, considered by some to be the first candy ever made in recorded history, with sesame seeds and honey. Nowadays, halawa is served in many cultures all over the world, using ingredients ranging from semolina flour to almonds to yams but the most traditional recipe calls for tahini (sesame paste), honey, and pistachios. My aunt says that she remembers my Lebanese great-grandmother cooking up big batches of this sweet, though nobody thought to save the recipe she used because halawa wasn't one of their favorites.

I can understand that. I do like halawa, but I admit that it is kind of an acquired taste. The texture not exactly fudgy, slightly flaky, slightly creamy. It's not super-sweet like most Western desserts, and the tahini gives it a faint smoky taste (I've heard some people substitute the tahini with almond butter which sounds intriguing though I've never tried it). But it's also incredibly addicting. I find myself craving it sometimes, and when a halawa craving hits, nothing else will do. There is literally nothing else like it in the world.

I've been making halawa a lot lately, to try and get Anouk in touch with her Lebanese roots (she didn't like it at first but seems to like it more and more every time she has it). Though I don't have my great-grandmother's specific recipe, it does make me feel a connection with her every time I make this and I love that.

Ingredients:

1 cup honey
3/4 cup roasted, unsalted pistachios
1/2 tsp vanilla
1 cup tahini, stirred

Directions:

Over medium heat, cook the honey until it reaches 240 degrees F, or the "soft ball" stage (when dropped in water, the honey forms a round, flexible ball). Let cool slightly, then stir in the nuts and vanilla. Fold in the tahini, then stir well to combine. Pour mixture into a lightly greased dish (we find a standard bread loaf pan works well for this). Chill in the refrigerator for 24 hours. Cut into pieces and serve at room temperature. Makes about 1 pound.

Horchata

Thursday, July 25, 2013


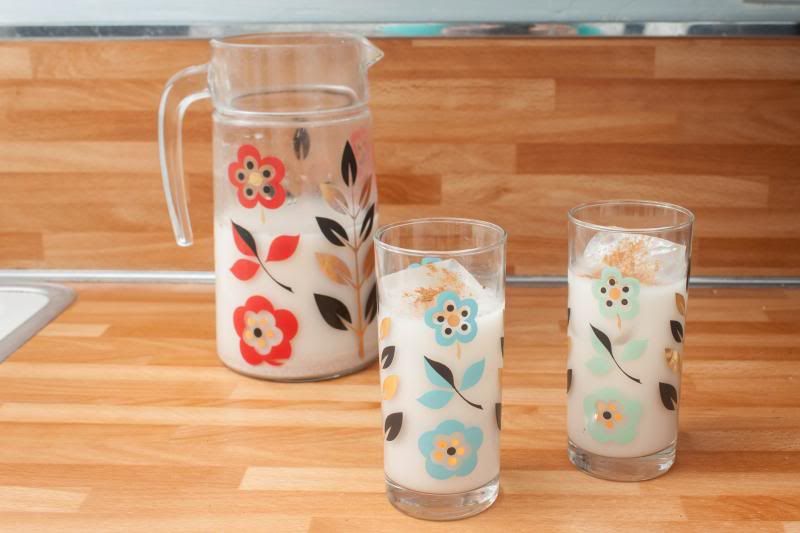
This drink was a staple in the Peruvian restaurants in our old neighborhood in Arlington. At first I looked at it kind of askance, but it turns out that cold, sweetened rice milk and cinnamon is actually the perfect thirst quencher on a hot day. I always forget about horchata in the cooler months, but when the temperature climbs into the nineties, I remember and check to see whether we have all of the ingredients to mix up a pitcher. Our favorite recipe is adapted from this one.

Ingredients:

1 cup uncooked white rice 
3 cups warm water
1 cinnamon stick
2 cups rice milk 
2/3 cup agave nectar 
ground cinnamon 

Directions:

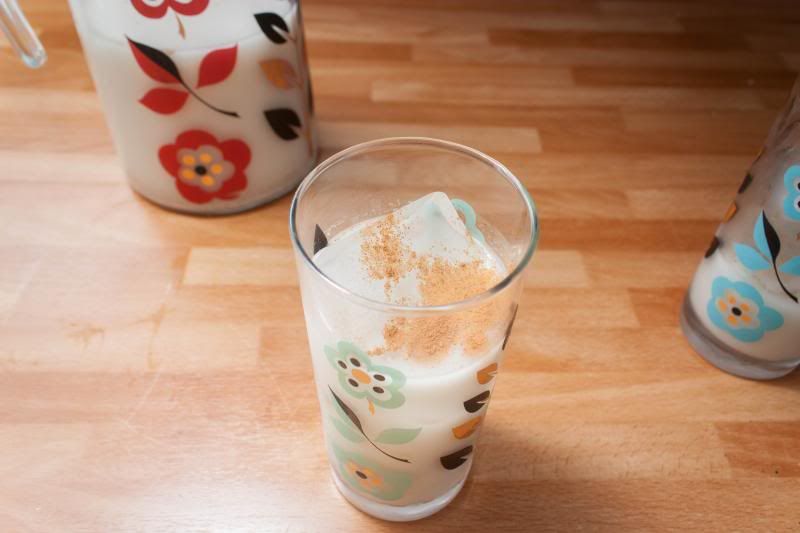
Grind the rice in a blender or food processor until it looks like fine-ground polenta. In a bowl, combine the ground rice, cinnamon stick, and warm water. Cover and refrigerate overnight. In the morning, remove the cinnamon stick, and puree the rice/water mixture. Strain through a sieve, pressing to get as much liquid out as possible. Add the rice milk and agave, and stir well. Serve over ice with a little ground cinnamon sprinkled on top. 

Just like being back in the old neighborhood. Happy weekend! 


Watergate Salad

Monday, July 15, 2013


The best recipes for cooking with very little kids (at least, in our kitchen) are the ones in which not a lot of actual cooking is involved. In my experience, a toddler's attention span is mostly limited to dumping things in a bowl and stirring and not much else. This recipe for Watergate Salad, then, is perfect because dumping things in a bowl and stirring is basically all that's required to make it.

Watergate Salad was first served at the Watergate Hotel in DC in the 1970s, which is strange to me because it seems like this kitschy, neon-green dessert would be the last thing you would think of gracing a high-end hotel brunch buffet. Still, the mix of chilled pudding, marshmallows, and fruit make it a wonderful treat at a cookout on a hot summer day.

The recipe we use is adapted from the one published on the Kraft Foods website, with a few special additions that sprang up over the years (as we really just experimented with throwing random things in the mix).

Ingredients:

1 20 oz. can of crushed pineapple, with juice
1 cup mini marshmallows
1 cup pecans
1 cup blueberries
1 package instant pistachio pudding mix
1.5 cups Cool Whip, thawed
Shredded coconut (sweetened or not, depending on your preference)

Directions:

Combine the pineapple, marshmallows, pecans, blueberries, and pudding mix in a large bowl. Add the Cool Whip. Refrigerate for one hour. Sprinkle shredded coconut generously over the top of each serving. Eat.

____________

The last time we brought this to a party, someone commented that it was like sex on a plate. Which isn't perhaps the most kid-friendly way to talk about something your two-year-old helped make, but it sure is descriptive.

Are there any retro recipes that you can't help but love?

Watermelon Cookies

Tuesday, July 9, 2013

Last week, during one of those long afternoons of rain that we endured, I suggested to A. that we make sugar cookies. However, upon closer inspection, it became apparent that we lacked several key ingredients necessary for this process (little things like flour, butter AND SUGAR). As a tantrum built, I quickly scanned the shelves for something, anything, that would produce a cookie-like effect on my toddler. When my eyes fell on the watermelon, waiting patiently for Fourth of July festivities, I had an idea.

After a little experimenting, we decided we could make watermelon cookies -- use cookie cutters to cut shapes out of the watermelon, frost them with coconut whipped cream (Cool Whip would also work), and decorate them (with berries, kiwi, sliced almonds, mint). We had just as much fun making these watermelon cookies as we would have ordinary sugar cookies and they were just as tasty (and far healthier), too.


We made sure to gently pat the watermelon dry before applying the whipped cream (if the fruit is too wet, the cream will slide right off). By the time we finished decorating the last cookies, the first ones were looking a little melty, so we slid the whole tray into the freezer for 10 minutes to let everything firm up. Then we took our nice chilled watermelon cookies outside and ate them on the deck (in the one fifteen minute period of sunshine we had in those gloomy four days).

Anouk couldn't bear to eat her snail cookie. "I don't wanna eat him, I love him!" I waited until she forgot about him and then I ate him. (He was delicious).


Spiced Sugar Coated Peanuts

Tuesday, July 2, 2013


Anne and I made a great find at the Cape Hatteras lighthouse gift shop a few weeks ago -- a copy of 25 Secrets Revealed: A Culinary Tour by OBX local Kevin McCabe (we also got to meet the author!) McCabe grew up in the Outer Banks, but his travels have taken him all over the world, and his cookbook is a collection of his favorite recipes he's collected along the way along with the stories of how he encountered them.

So far we've only had the chance to try a couple of the recipes (though I plan to work through the rest of the book as soon as possible). But this recipe, for sugar spiced peanuts, is one we've made a few times. McCabe created it after he spent time in Indonesia, and it is delicious and addicting.
___________

Ingredients:

2 cups raw peanuts with the skins on
1 cup of sugar
1/2 cup of water
1/4 teaspoon cinnamon
pinch of allspice

Directions:

In a heavy saucepan, dissolve the sugar and water over medium heat. Add the peanuts and stir very gently from time to time. After 8-9 minutes, the mixture will begin to look like rough sand and all the bubbling sugar will suddenly disappear. Quickly spread the nuts onto a nonstick cookie sheet and sprinkle on the cinnamon and allspice. Place them into a 275-degree oven for 25-30 minutes, stirring lightly every 5-6 minutes. Let cool and see how long they last.
___________

This is a quick recipe -- it goes fast, both the cooking and the eating of it. We made another batch with almonds, just because we could, but the peanuts were the real star. Something about how creamy they get when they're roasted...  Still, I think this recipe should be pretty easily adaptable for kids with peanut/tree nut allergies -- just substitute pumpkin seeds or even soybeans in place of the peanuts. (I would love to hear how this works if any of you decide to try it!)

You can get your copy of 25 Secrets Revealed here. 

Lemonada (and other Greek Fest goodies)

Tuesday, May 21, 2013

The Norfolk Greek Festival holds a special place in mine and James's hearts -- during his first visit home with me at the end of freshman year of college, I took him to Greek Fest and plied him with food in hopes of creating a positive association with my hometown (I think it worked). Since then, we've done our best to hit it up every year that we can, and last weekend, we took Anouk for the very first time.

Anouk enjoyed her first Greek Fest very much, especially the eating part of it (which, honestly, is most of it). Every single thing she ate, she loved, from dolmades to gyros to calamari. In fact, she enjoyed everything so much that we spent the rest of the weekend looking up Greek recipes we could make for her at home. Most of what we found looked pretty labor intensive but this simple recipe for Greek lemonade was so intriguing (and turned out to be so delicious) that I knew from the first sip that it was a keeper.

Lemonada

5-6 lemons
1 cup sugar (or to taste)
2 cups water (or to taste)
1 tsp orange blossom water (we got ours at Azars, in Ghent, but it's also available online)
3-4 mint sprigs

The secret that makes this lemonade taste so good seems to be in the juicing technique, which incorporates more of the oils and the rind than normal juicing procedures. Cut 5-6 large lemons into the thinnest slices possible. Place in a bowl, and pour 1/2 cup of the sugar over top. Let sit for 5 minutes, then use your hands to squish and squeeze the lemon slices. Strain the juice through a sieve into a pitcher. Repeat this process, using the rest of the lemons and sugar, until you can't get any more juice out of the lemons. (For us, 5-6 large lemons yielded about 2 cups of juice). The lemon pulp and peels should look pretty shredded by the time you're done.

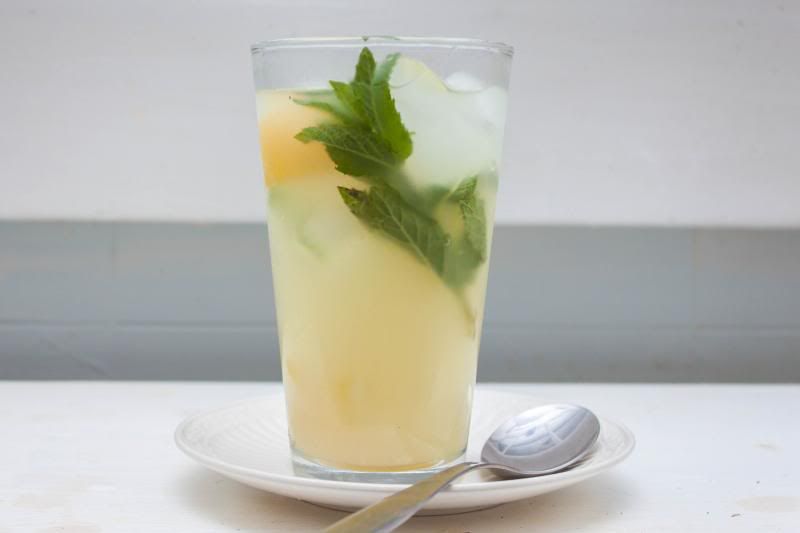
Add water and additional sugar to taste (we added about 2 cups of water, but didn't add any more sugar). Add the orange blossom water to the lemonade, stir well. Crush 2-3 mint leaves, add to a glass with ice, and pour the lemonade over it. Garnish with an additional sprig of mint and some lemon slices.

This is the best lemonade I've ever had -- the orange blossom water adds a nice floral note and the mint spices everything up and makes it even more refreshing, somehow. Next time I make it, I'm toying with the idea of adding sparkling water for fizz. I also think it would be just swell with a jot of vodka in it, too. But that is an entry for another blog entirely.

Some more pictures from our Greek Fest experience:

^^ The line for the loukoumades tent was so long (but they were worth the wait)


^^ Ecstatically enjoying some grape leave rolls


^^ Browsing the agora with mama


^^  Opa!

Virginia-Style Brunswick Stew

Thursday, April 25, 2013


Brunswick stew is -- or might be, there's some confusion -- a Virginia original. There are variants up and down the southern US seaboard and I have had many of them. It's interesting, the different twists that each locality puts on this classic. In Georgia, the broth is thin and very spicy.  in North Carolina, pulled pork is used in place of chicken or beef, and the stew tends to be so thick that you can stand your spoon in it. Virginia-style Brunswick stew falls somewhere in between and therefore is juuuuust right, like Goldilock's porridge.

Brunswick stew is one of my favorites for pulling dinner together in a hurry out of the odds and ends left in your freezer at the end of a busy week. Once you have the base, which is smoky, spicy, and tangy, you can add almost any protein, veggies and legumes you want and it still comes out delicious. I know some purists say there must be okra. Some say there have to be butter beans or peas. This week, we made our Brunswick stew with corn and lima beans that I excavated from the bottom of the freezer, some spicy pork sausage (from Crabill's, by way of Greenway Beef), and the leftover rotisserie chicken we had earlier in the week. We're looking forward to trying a version with venison during hunting season. And my friend's mom assures me that when she was growing up in Virginia, squirrel was a necessary staple of Brunswick stew.

You can find the recipe that we use most frequently below. I promise there is no squirrel in it.

Brunswick Stew

-2-2.5 lbs chicken
-1 onion
-4 cups chicken broth
-2-3 russet potatoes
-1 can (28 oz) stewed tomatoes
-3 tbsp barbecue sauce
-1 tbsp Worcestershire sauce
-1 cup corn
-1 cup butterbeans
-2 tbsp apple cider vinegar

Cut chicken into pieces and saute in cast iron pot with onion in butter or oil until just barely cooked through. Add chicken broth, stewed tomatoes, diced potatoes, barbecue sauce, Worcestershire and one tablespoon of apple cider vinegar. Bring to a boil. Add corn and butterbeans, then reduce heat to a simmer. Cook until meat and potatoes are tender to the point of falling apart (stew should be on the thick side). If you've pre-cooked the chicken, this should take 1.5 to 2 hours or so. About 15 minutes before taking the stew off the heat, stir in the second tablespoon of vinegar, and season with salt and pepper to taste. Serve piping hot.

My little cooking buddy was lured in by the smell of onions frying and watched the whole process with great interest.


For the record, Anne can demolish three or more bowls of Brunswick stew, no joke. Last time we had it, I was so entertained watching her that I forgot to eat my bowl of stew, so she ate that, too.

Have a great weekend, everyone!

Homemade bread (and butter!)

Monday, January 28, 2013


This past week has been a long one in our house. Anne came down with a nasty cold last Sunday, passed it on to me, and then I passed it to James. And then just when we thought the little one was almost all better, she came up to us and informed us that "ear HURT, mama." We took her to the pediatrician, the whole sneezing lot of us (we were very popular in the waiting room, as you can imagine), and found out that on top of a cough, A. also has a double ear infection.

We're on the mend now, but long story short: we spent a lot of time inside the house last week. Which means I don't have any fun adventure posts in the can to post this week.

But we did try to keep busy, all the same. One of the things I like to do when I'm not feeling bad enough to lay on the couch all day but am feeling bad enough to crave comfort food is to break Paleo edge and bake a loaf of bread. Anne likes it, too. Bread is a little bit like magic, even if you're an adult. To a kid, it's super-mega-amazing. This little ball of goop? Watch it get bigger and bigger and turn into something completely different.

I especially like this recipe because it requires minimal effort, as far as bread-making goes -- it doesn't need an overnight rise or a second kneading. An hour from proofing the yeast, I was pulling a fully-baked loaf from the oven. And it's delicious, the perfect satisfying texture -- chewy crust with a soft, fluffy interior. It doesn't get much better than that.

Unless...you add butter!

Which leads us to the second part of our kitchen magic show: homemade butter. I remember making this with a group of preschoolers back when I was a camp counselor in the summers during college. It's really the easiest thing in the world: fill a jar halfway with heavy cream. Screw the lid back on, and shake shake shake. Within 10 minutes of continuous shaking, the fat will start to separate from the whey. Shake it another five minutes, and you'll have real-life actual butter.


Some tips: First, a lot of online butter tutorials call for you to put marbles in the jar along with your cream. This is not necessary and is not recommended, at least in my opinion. It's a good idea to chill the jar in the fridge or freezer for a little while before starting, and I learned the hard way back in the day that sometimes marbles + cold + vigorous shaking = broken glass. We didn't use anything in our jar, and it turned out fine. Don't be taken in by the pro-marble movement!

Second, the butter from this method tends to be a little wet, so we squeezed it in a cheesecloth once to get the liquid out.

Third, you should add some salt to your butter after you scoop it out. About 1/4 teaspoon should do it. You can also add other stuff to your butter, if you want -- we added a touch of honey, but you could also do thyme or oregano (or cinnamon or pretty much anything). And don't forget about the buttermilk in the jar after you take the butter out!

This butter also tends to be excellently delicious.


Stay healthy, everybody! Wash your hands, for real. 

New Earth Farm

Monday, November 5, 2012


One of the reasons I'm glad we joined the CSA at New Earth Farm this fall is that we now have an excuse to visit the farm every weekend, come rain or shine. Over the past few months, it has become one of my favorite places. Not only is it the place where we get most of our food, not only is it all delicious (and 100% organic), but every person we've met there is warm and welcoming (almost suspiciously so) and the farm itself is beautiful. I especially love the old tumbledown house that greets us when we arrive.

The past few weeks we've gotten a ton of eggplant in our New Earth CSA boxes, so I thought I would share one of my favorite eggplant recipes, modeled off of a Middle Eastern dish my grandmother used to make, called Batinjan. It's heavenly on chilly nights.

Beef and eggplant stew

2-3 cloves garlic
1 small onion
2 tablespoons cumin
2 lbs ground beef

4 small eggplants (I used the skinny purple and green ones)
3 cups tomato sauce or crushed tomatoes

2 large potatoes

Brown the onion and garlic in olive oil in a saucepan, add the meat, sprinkle cumin on top. Cook meat until almost done, and add the chopped eggplant and saute a bit longer. When eggplant has just started to brown and meat is cooked, add the can of tomato sauce. Add enough water to just cover all the meat and veggies in the pot. Bring to a boil, and then turn down heat and simmer for about 40 minutes.

Microwave the potatoes for five minutes and let cool. About halfway through the stew cooking time, cut the potatoes into chunks and add to the stew. Season with salt and pepper according to taste. Serve over rice or in a bowl with flatbread.

Happy Monday! What did you get in your CSA box this week?


Maple Cinnamon Marshmallows

Monday, October 8, 2012


Today is the first truly cold morning of the year for us and it's hinting deliciously at all sorts of shivery days to come. As soon as I woke up this morning, I knew exactly what was on the agenda for today for me and Baby Anne: socks and sweaters over pajamas and big steamy cups of hot chocolate. And in order to truly enjoy the hot chocolate experience, we need our favorite homemade marshmallows to go with it, don't we?

Maple Cinnamon Marshmallows (adapted from this recipe)

1 cup water
1 cup pure maple syrup
3 tablespoons gelatin
1 teaspoon vanilla
1/4 teaspoon salt
Dash cinnamon

Grease a 9x9 baking dish and line with parchment paper in both directions. Combine 1/2 cup water with gelatin in the bowl of a stand mixer and let soften. Combine the other 1/2 cup water with maple syrup, vanilla, and salt in a saucepan over medium-high heat and bring to a boil. When the temperature of the mixture reaches 240 degrees (soft ball stage) according to a candy thermometer, remove from heat.

Turn the mixer on medium and pour the maple syrup mixture into the bowl with the gelatin and water. Beat for about 10-12 minutes, until it turns thick, white, and fluffy (it will look a lot like marshmallow fluff).

Turn the marshmallow mixture into the baking dish, and apply another sheet of parchment paper to the top. When the mixture is set (we like to leave it overnight), peel off the top layer of parchment paper and use the bottom layer "handles" to lift the giant 9x9 marshmallow from the dish onto a cutting board. NOTE: you will be tempted to eat the giant marshmallow right then and there. Resist this urge and cut it up into smaller, less giant marshmallow pieces (You can butter your knife to make this easier).

Sprinkle marshmallow tops with cinnamon. Voila! You have the perfect homemade, fall-festive (and Paleo) marshmallows, perfect for these hot-chocolate days ahead.


Monday links:

Blog Design by Nudge Media Design | Powered by Blogger