Showing posts with label rainy day activities. Show all posts
Tissue Paper Bowls
Monday, September 2, 2013
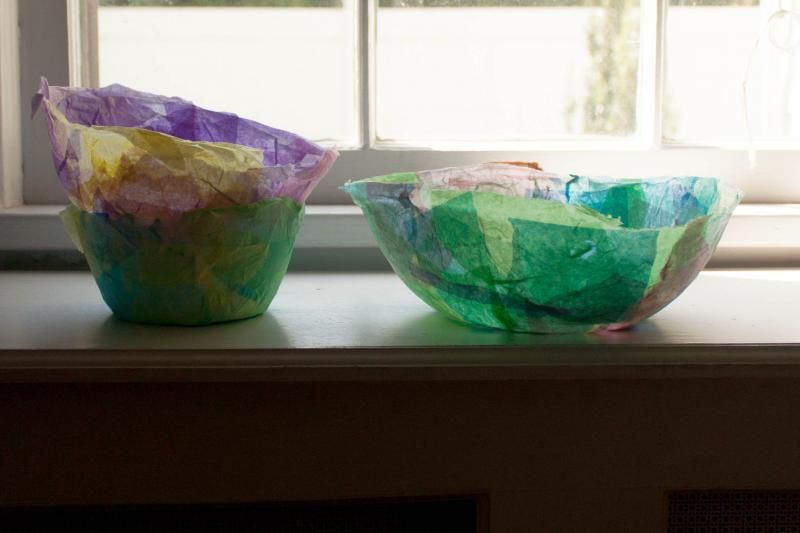
I saw this craft on Design Mom a few weeks ago -- she used balloons to shape tissue paper into beautiful paper mache bowls. We didn't have any balloons in the house, so Anouk and I adapted the craft a bit by using kitchen bowls of various shapes and sizes for our designs.
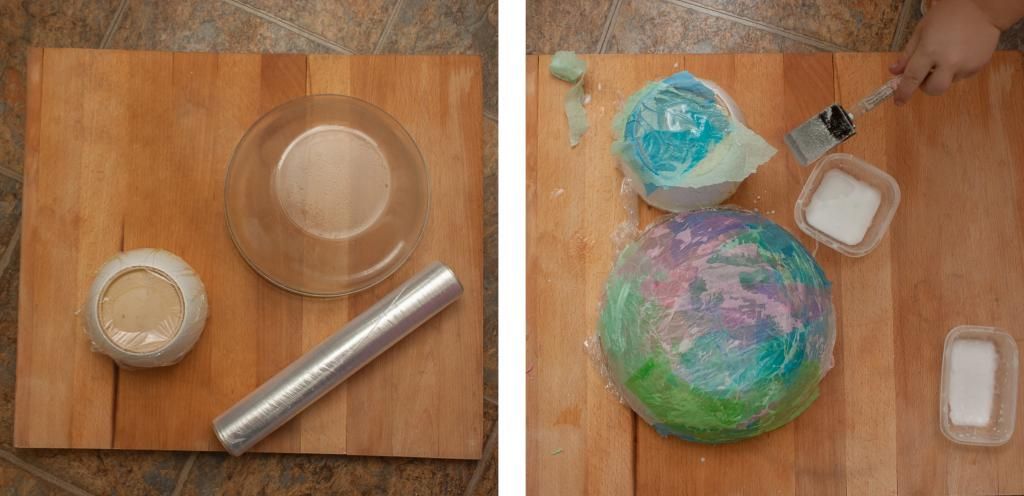
First, we coated the outsides of the bowls with cooking oil and covered them in plastic wrap. Then A. and I got to work tearing strips of tissue paper into small pieces, and pasting them to the plastic wrap with a thin coat of watered down Elmer's glue. After about three or four layers the bowls seemed pretty completely covered, so we set them outside and let them dry. An hour later, we (read: I) gently turned the tissue paper bowls out and sat back to admire the pretty stained glass effect of the light coming through the paper.
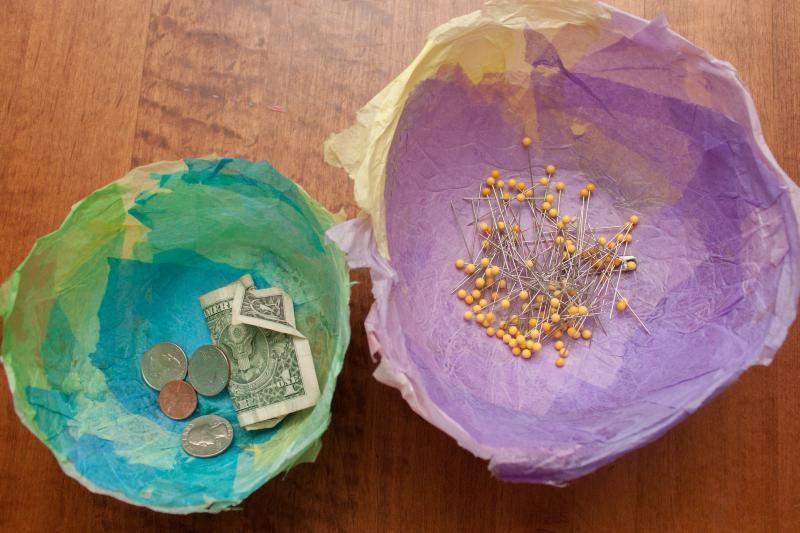
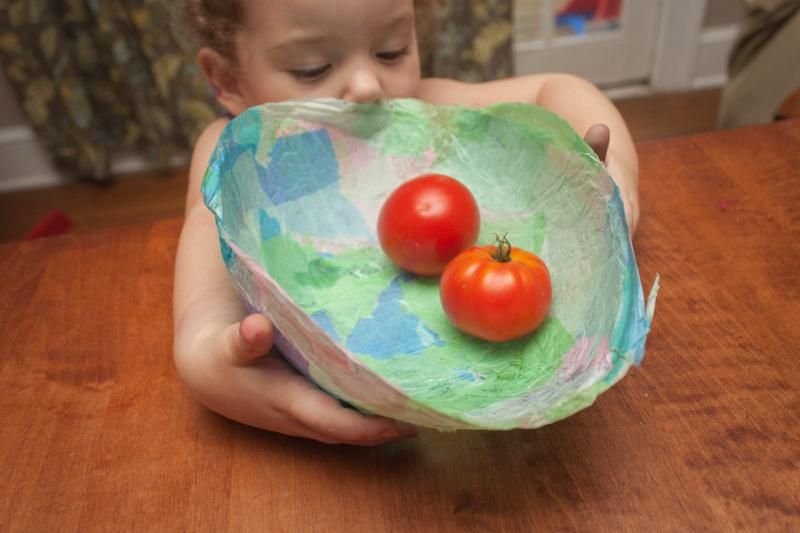
We trimmed the edges of the biggest and smallest bowls, but I thought the ragged edge on the purple bowl (which A. did all by herself) was kind of cool so we left it. Currently, our bowls are scattered around the house holding small things like loose change and pins (I like to throw them in there as I sew, so much quicker than poking them into a cushion) and the random stuff A. collects on her travels around the house and yard.
We really enjoyed this project -- it doesn't take a lot of finesse and there is something therapeutic about turning your mind off and just piling the colors on. I'm currently thinking about ways to adapt this project for the holidays, so stay tuned. This craft will surely pop up again in the coming months.
Sand Clay
Tuesday, August 27, 2013
I've had a bag of sand hanging out in the garage since I planted my raspberry bushes a few months ago (they like a mix of sand and soil for good drainage). The hardware store where I bought my bag only carried sand in 50 lb increments, and I only used about 2 lbs in my planting, which means I have 48 left to use up somehow. Enter sand clay.The texture of this clay is just like a grainy play-dough, but the real fun of it is that it will dry hard, meaning that you can use it to make summer treasures to keep.
Ingredients:
2 cups sand
1 cup cornstarch
1.5 cups water
2 tsps alum (found in the spice aisle)
Directions:
Combine the ingredients over medium-low heat, stirring constantly. Within a few minutes, the dough will begin to thicken up like playdough. Turn out onto a surface, kneading smooth when cool enough to touch. Shape and let dry overnight (or longer) to set. The clay can be stored in an airtight container for three or four days or so.
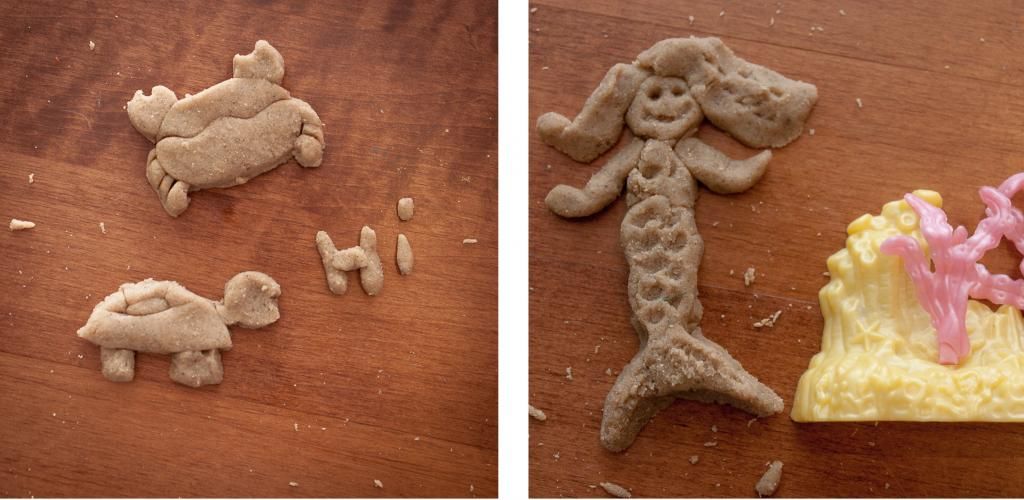
We made a sand castle, of course, and used our beach toys to cut out shapes and some shells from a recent beach trip to decorate them with. About halfway through I realized I could make Christmas tree ornaments and so I worked on that while A. made a few extremely scary sand snakes. We set our shapes outside in the sun to dry (it took about 12 hours) and put the rest away to play with over the next few days (by the end of day four it was gummy and pretty much finished). And only one piece broke, which is a higher success rate than we've had with either salt clay or baking soda clay.
I think this would be a great craft for when you want a little beachy fun but can't get to the beach, or a creative way to use up some of that sand you might bring back from a special beach vacation. I have a jar of sand somewhere that J. and I brought back from the red sand beaches of Prince Edward Island a few years ago -- if I can find it, I'm going to pull it out and make of ornaments out of it.
That last picture makes me think of this. Snake! A snaaaaake!
Flower Arranging
Tuesday, July 30, 2013
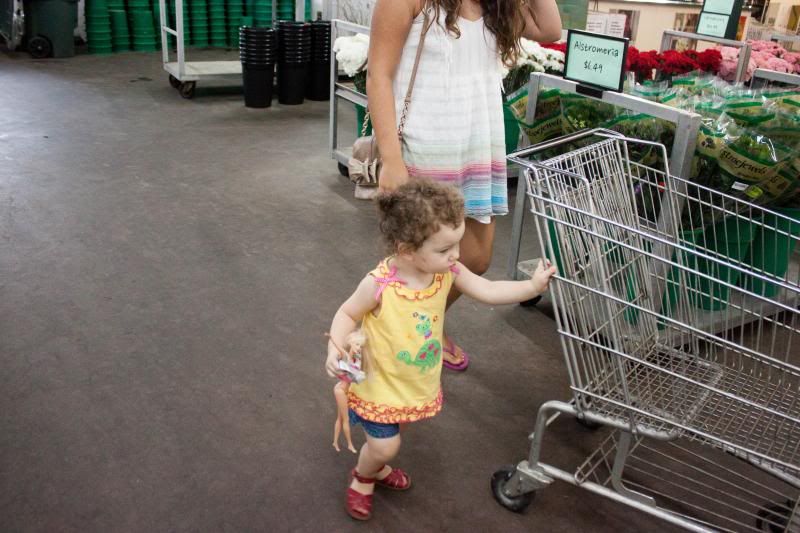
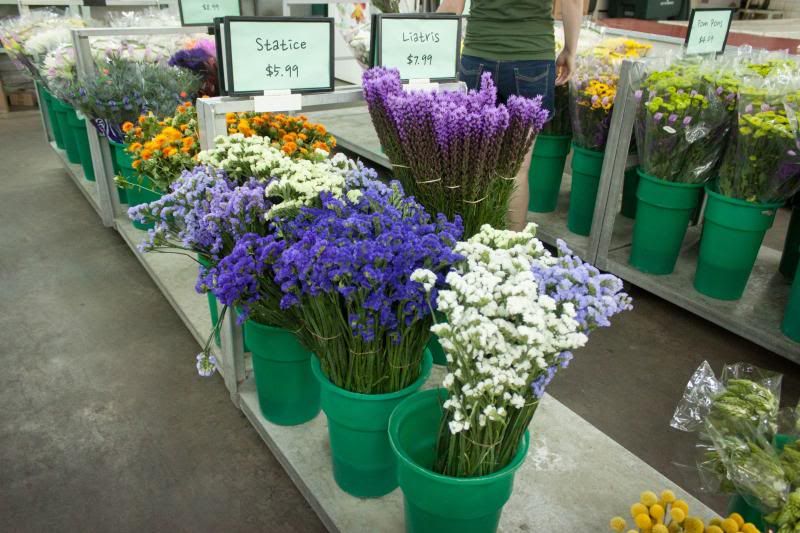
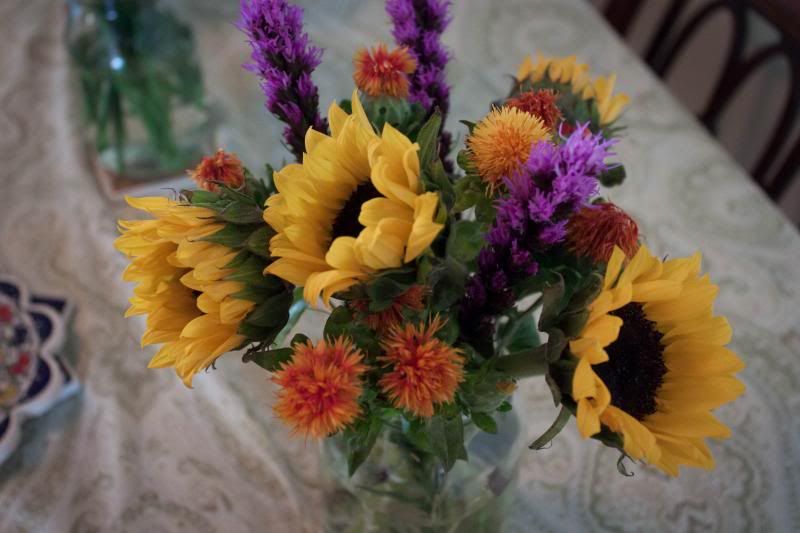
We're spending some time with Anouk's cousin KK this week, and it's been a little bit of a challenge to think of crafts and activities that will appeal to both a toddler and a thirteen-year-old. Finally, after a lot of thinking, we decided that we would pay a visit to Norfolk Wholesale Florist, to get some supplies to make flower arrangements.
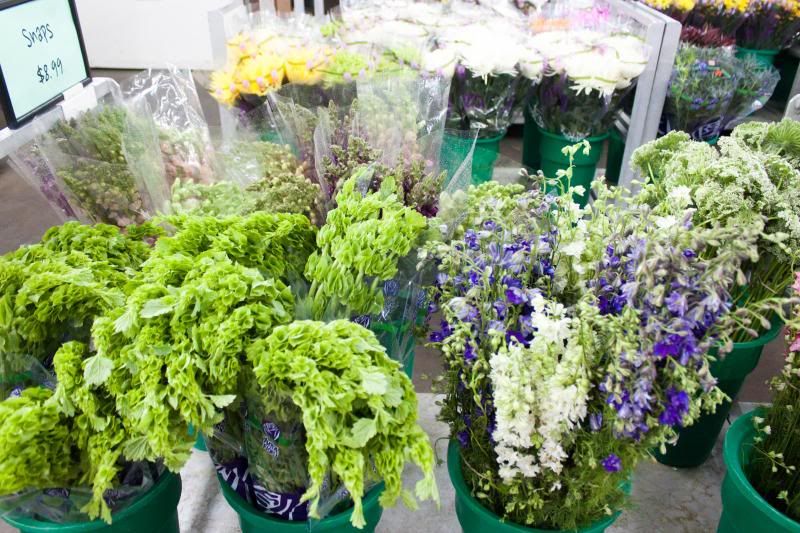
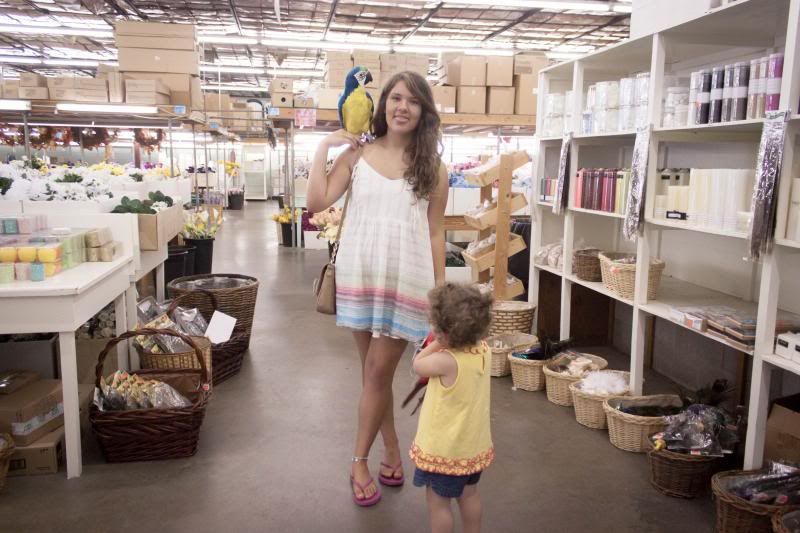
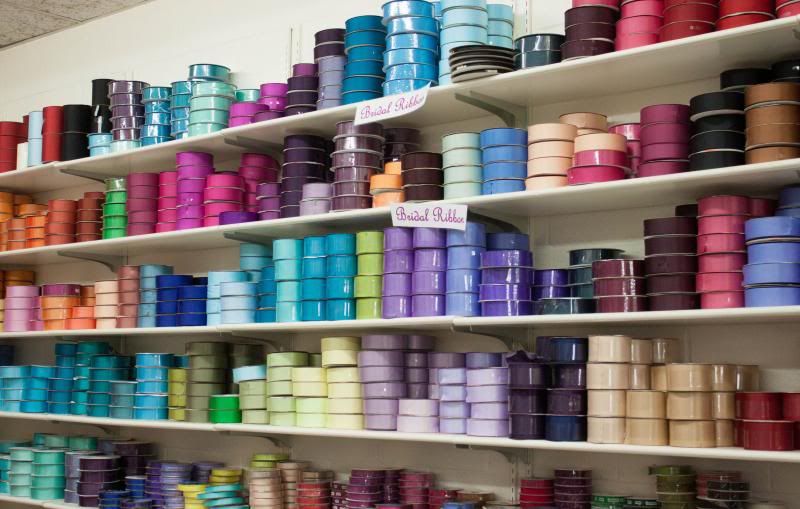
Norfolk Wholesale Florist is kind of paradise if you're a flower lover. There are blossoms everywhere -- from exotic orchids to delicate baby's breath, PLUS all of the accoutrements you need to tie them all together (including very realistic stuffed parrots, below). We gathered our blooms (fawning over some of the more exotic ones like protea and star of Bethlehem), browsed the selection of vases, and then stopped by the ribbon room (truly a crafty mom's delight).
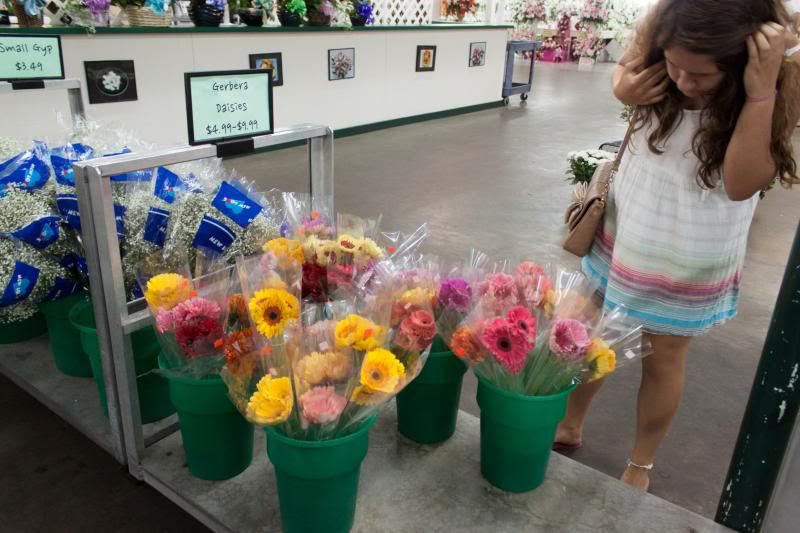
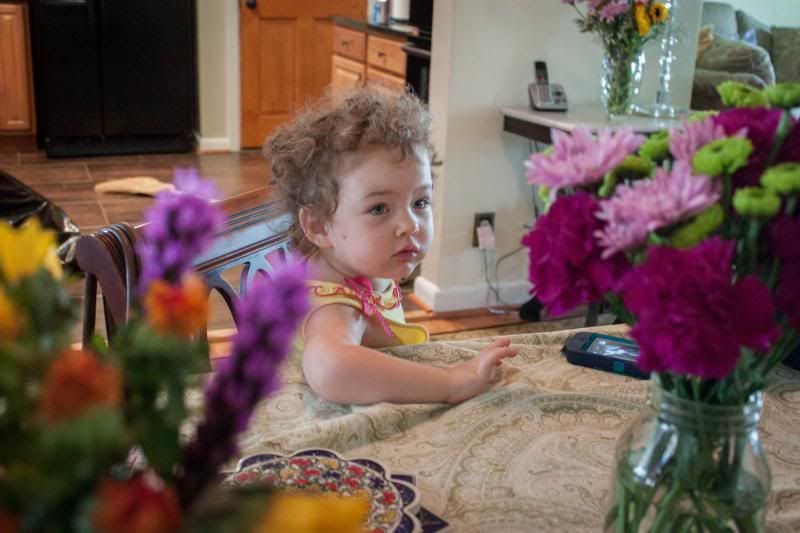
I gave each of the girls some cash and then stepped back to see what they would choose to buy with it. KK got her hands on some beautiful gerbera daisies and bright carnations, while Anouk chose a handful of lime green mums and some sunflowers. I of course couldn't leave myself out, so I picked up some safflowers and tall purple liatris. I can't say enough about how helpful the NWF staff were -- they helped us find everything we needed and gave us lots of hints about how to make the best-looking, longest-lasting bouquets.
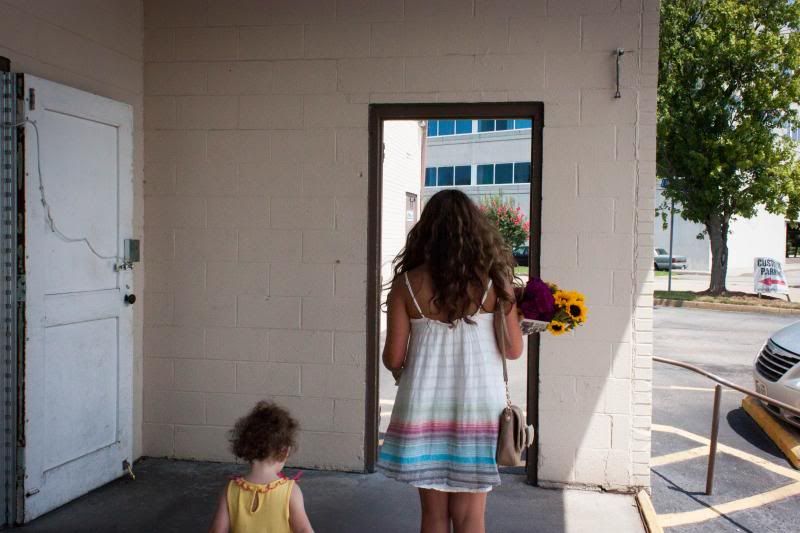
At home, we set to it and arranged our dozens of flowers as artistically as we could. Altogether, $30 got us enough flowers and filler for six small bouquets! I think they turned out to be pretty amazing.
Here are some links on flower arranging that we found helpful when putting our bouquets together:- Martha
- More Martha
- GOOP (yes, GOOP)
- Montessori Primary Guide
Washer Necklaces
Tuesday, July 23, 2013

We have been having really bad luck with Pinterest finds lately. The Listerine manicure and pedicure soak did nothing more than turn my hands and feet slightly green. The vegetable oil I put on a vintage bowl to remove the sales sticker ended up taking off a good chunk of paint (but left sticker remnants behind). And the baking soda clay that we tried last week crumbled apart and cracked as it dried.
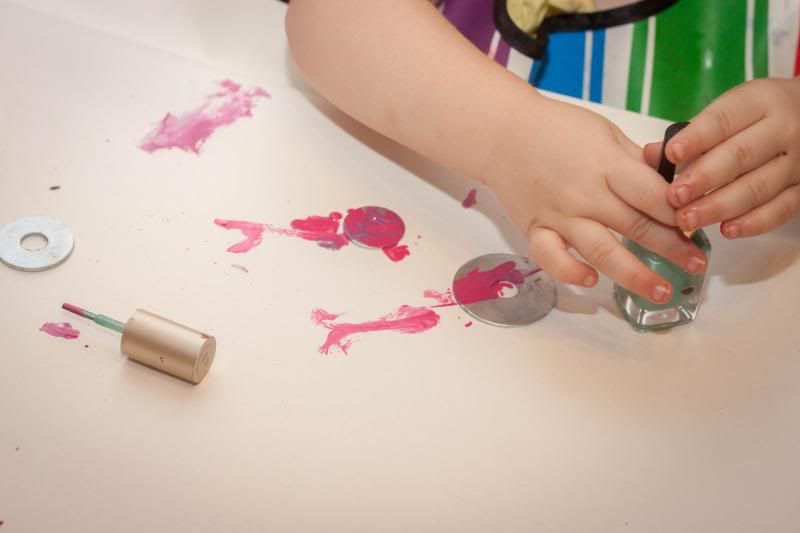
Luckily, this washer necklace project went well enough to get the memory of the other failed projects out of our heads. Probably because it was so so simple. We picked up different-sized washers from the hardware store and painted them with nail polish. When they dried, we added a coat of clear polish, and then strung them on some bakers twine and pretty crochet thread. It all worked just as it should, hurrah!
I am a big fan of vintage enameled jewelry, so I love how the nail polish gives the washers an enameled look. We used clear glitter polish to go over some of our designs for added sparkle, and then A. and I made coordinating beads with Sculpy to enhance our designs.We've been doing so many jewelry crafts lately that the next thing we DIY is going to have to be something to put it all in. Any ideas?
Rain Painting
Thursday, May 23, 2013
It's been rainy off and on these past few weeks -- the type of intermittent rain that allows just enough sun in between spells to lure you outside before sending you running back in again. The kind of rain that makes you turn to Pinterest in desperation for something, anything, to make the hours go a little faster. And that's how Anouk and I discovered rain painting.
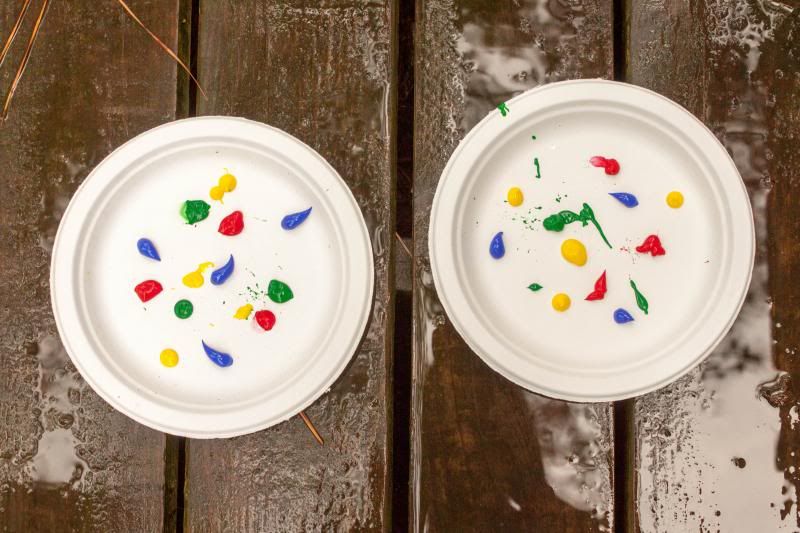
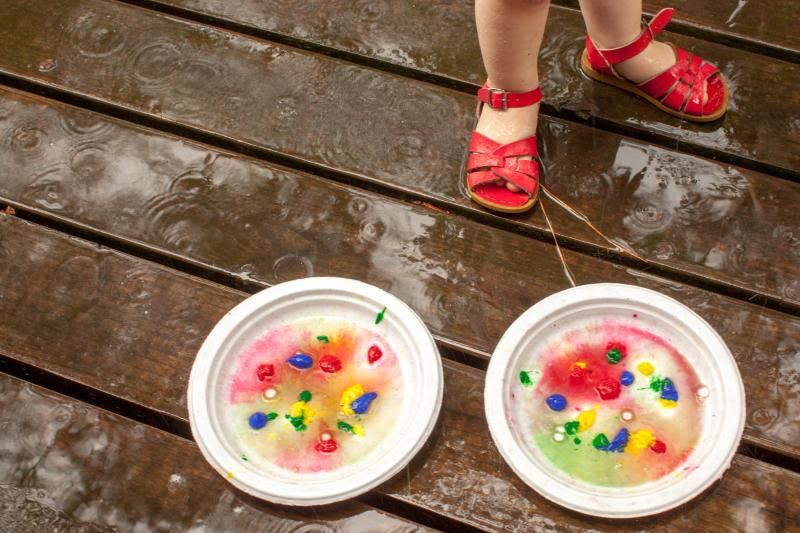
The blog we read called for us to use plain white paper for this project but we started with some paper plates because they seemed more durable. Specifically, we recommend the uncoated kind, otherwise your colors won't soak into the paper but bead up and run right off. We couldn't stand for grinding up our nice Ikea watercolors (not with Ikea being a three-hour drive away) so we dabbed tempera paint, in primary colors, on our plates instead. Anouk is just starting to learn her colors, and I thought it would be a rudimentary lesson on how some colors combine to make others. Then we put on our rain gear and headed outside.
At first, there was only a light rain, so we walked around the backyard, holding our plates, watching the falling rain spatter the paint into new designs. Soon, though, it started to rain harder, so we left the plates on the deck and watched through the windows as the designs mixed and bled together. And then it started to really rain -- and our neat splattery, blended designs became plates of rust-colored paint soup. Not very attractive.
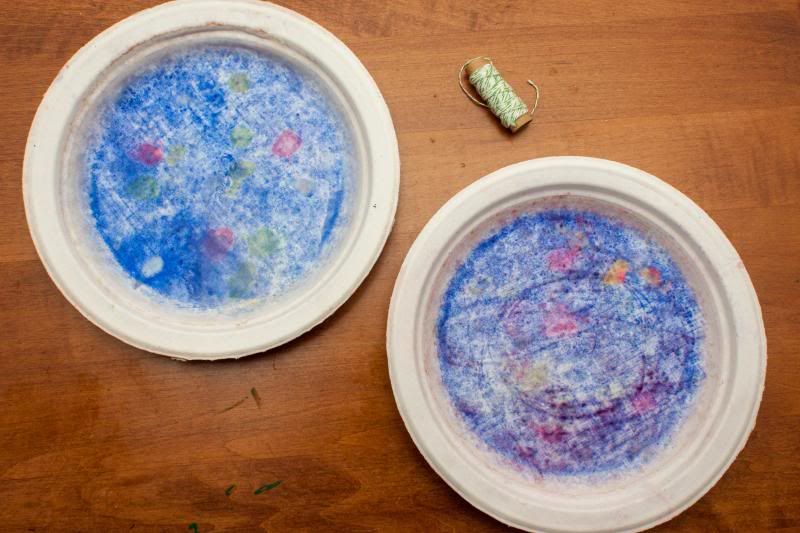
But after it cleared up, we went out and emptied the water from our plates to find that the colored water had left behind a patterned, vaguely tie-dyed design.

I'm not entirely sure what we're going to do with them -- maybe make a mobile out of them? Or save them for collage making? -- but I do think the end result is worth saving, a nice spot of color in our rainy day.
Happy Memorial Day! Here's to some sunny weather for the holiday weekend.
The blog we read called for us to use plain white paper for this project but we started with some paper plates because they seemed more durable. Specifically, we recommend the uncoated kind, otherwise your colors won't soak into the paper but bead up and run right off. We couldn't stand for grinding up our nice Ikea watercolors (not with Ikea being a three-hour drive away) so we dabbed tempera paint, in primary colors, on our plates instead. Anouk is just starting to learn her colors, and I thought it would be a rudimentary lesson on how some colors combine to make others. Then we put on our rain gear and headed outside.
At first, there was only a light rain, so we walked around the backyard, holding our plates, watching the falling rain spatter the paint into new designs. Soon, though, it started to rain harder, so we left the plates on the deck and watched through the windows as the designs mixed and bled together. And then it started to really rain -- and our neat splattery, blended designs became plates of rust-colored paint soup. Not very attractive.
But after it cleared up, we went out and emptied the water from our plates to find that the colored water had left behind a patterned, vaguely tie-dyed design.
I'm not entirely sure what we're going to do with them -- maybe make a mobile out of them? Or save them for collage making? -- but I do think the end result is worth saving, a nice spot of color in our rainy day.
Happy Memorial Day! Here's to some sunny weather for the holiday weekend.
Cardboard box projects
Monday, February 18, 2013
Would you believe we are still working on getting rid of leftover cardboard boxes from Christmas? We did a ton of online shopping, plus we had gifts shipped in from family and friends, and on top of that, our recycling pickup only happens every other week. Which all leads to a little bit of a backlog when it comes to getting rid of things. When people come over to the house, I try my very best to dissuade them from going upstairs to the office lest they get lost in a sea of boxes.
In the meantime, before they go, we have been trying to put our cardboard boxes to good use. I have to admit, I love cardboard box activities. The boxes are a cheap, easy-to-work-with, forgivable material, and when the enthusiasm for the new toy wanes, you can get rid of it, guilt-free (after all...it is trash, right?)
I thought I would link to a few cardboard box crafts, in case you, too, find yourself same predicament as us. All in all, we've probably tried a dozen or more box activities, but the ones below are our tried and tested favorites.
- A. can spend hours practicing writing skills in her salt writing tray, tracing the letters and shapes I draw for her and making up a few of her own. I like this rainbow-paper option just because it's cheerful.
- One: cut a hole in the box. Two: put your kid in that box. Three: dump some paint in the box. And throw the box away when you're done for mess-free toddler painting.
- Hanging different-textured fabrics from the roof of a box makes an engaging sensory play tunnel. Bonus: it gives you something to do with those lonely socks that lose their mates on the journey from the hamper to the dryer.
- A string of Christmas lights + a large box + something sharp to make small holes with = a homemade planetarium. We made one after our visit to the Children's Museum last week. It's already gone out to the trash (thanks to an enthusiastic jumping incident), but while it lasted, it was the bomb.
- If you've got a large, flat box (like the one James's grill grate came in), why not make a small world play scene? So far we've turned ours into a village backdrop for A.'s trains and a ball pit. In between times, it goes under the couch until we figure out what to do with it next.
And a couple for the big kids...
- Creating an imaginary land: like our play scene idea, only with the child's own imagination let loose. I can't wait until A. is old enough for this one.
- These cardboard box looms look really fun. (I might make one for myself.)
- A homemade reflector can give seedlings a boost until they're ready to go out into the garden.
We still have a few more boxes upstairs, so...what do you do with your leftover cardboard boxes? (Besides recycle them, of course?) Do you have any fun crafts or activities to share?
How to make a terrarium
Thursday, January 17, 2013

I blogged just before the holidays about how James and Anne and I were making a lot of our Christmas presents this year, and got a few inquiries about what we made and how it went. As to the latter question...it was a great experience but a lot of stress, and I think next year I might be a little less ambitious so that I can enjoy the holiday season more (you told me, Dee!)
As to what we made...my dad got a bunch of different pickles, my sister and cousin got handmade necklaces, my mom got a disk with all 4,000 pictures I have taken of Anne since she was born painstakingly cropped and edited (this was by far the biggest time-sink).
But the project that was the most fun to make was the terrariums we made for my aunts. They got a great response, and I liked them so much that last weekend, I decided to make a couple for myself. At not yet two, this wasn't a project Baby A. could really participate in, but I think older kids might really enjoy it. So I thought I'd share.

You will need:
- glassware
- gravel or small rocks
- activated charcoal
- potting soil
- plants
- spaghnum moss
A few notes: first, we found that the best place to get inexpensive terrarium glass is the thrift store. We visited a few and found all shapes and sizes, big, small, round, square, lids and no lids. (Though you should consider the type of plants you want to grow when choosing your terrarium -- succulents and cacti won't do well in a terrarium with a lid because of the extra moisture.)
Second, it's important to note that activated charcoal isn't the same as the charcoal briquettes you use for grilling -- the kind you need for a terrarium is the same kind found in aquarium filters. We pulled apart an old Brita filter and used the stuff in there but garden centers may also sell it. Speaking of garden centers, McDonald Garden Center in Virginia Beach has a wonderfully extensive terrarium section, and Alan, who manages it, is all too happy to discuss the types of plants that work best together, arrangement ideas, plant care, etc. We had a blast talking to him and got a lot of inspiration from his beautiful creations.
Third, we found that choosing plants of differing heights/colors/textures makes for the best-looking arrangement, but this is obviously a subjective thing and will vary from person to person.
Step 1: Wash and dry your glassware. This will help prevent bacteria/mold growth.
Step 2: Add a layer of rocks. (It's probably best to give them a quick wash, too). The rocks will help with drainage -- because there's no drain holes in your terrarium, the rocks will keep the water off of the roots of your plants and keep them from rotting. We used little bags of stones we found in the garden department at Ikea for $1.
Step 3: Add a thin layer of charcoal on top of the rocks. This is not strictly a necessary step, but it will keep the terrarium fresh and help with odors from any standing water.
Step 4: Wet the potting soil (it should be damp, able to somewhat hold its shape if you squeeze it in a ball but not dripping) and add it on top of the charcoal. Altogether, the rocks + charcoal + soil should take up at least 1/3 of your terrarium.
Step 5: Remove your plants gently from their containers. Dig shallow holes with your hands or a spoon, and place the plants in. (If you've chosen a container with a narrow opening, you can use chopsticks or tongs to maneuver the plants into place). At this point, you might want to move them around a bit to find the best arrangement. When you've gotten them just how you like them, gently pat another layer of soil over top of the root ball to hold the plants in place.
Step 6: Add spaghnum moss and any decorative objects you might find to your terrarium.
I had a hard time taking photos for this project...it's difficult to remind yourself to stop and take a picture when you're in the moment and your hands are covered in dirt and charcoal. For more detailed step-by-step and for information on caring for your terrarium, click here.
Or you can attend the terrarium workshop at McDonald Garden Center this Saturday, January 19th, at 2 PM. More details here.
Salt crystal painting
Wednesday, January 9, 2013
Salt crystal crafts seem to be popping up all over the internet lately. Just in the past week or so, I've run across tutorials for making your own DIY frosted windows, growing snowflakes and icicles in a jar, and making a salt crystal garden.
Baby A. and I decided to make a few tweaks to make this activity a little more toddler friendly, and did a little salt crystal painting one afternoon earlier this week. This craft rules because it's virtually mess free and because you are guaranteed to already have everything you need for it somewhere in your house.

The first step is to mix a salt solution. The perfect ratio is about one part salt to four parts water; we found that three tablespoons of salt in a 1/4 cup of water worked best for us. (We used table salt -- you can also use Epsom salts or borax crystals, though neither of those are safe for eating).
Add the salt to the water a little bit at a time, stirring to dissolve it as completely as possible in between. When the salt stops dissolving in the solution (crystals will be floating on top of the water and will remain at the bottom of your cup), nuke it in the microwave for about 20-30 seconds (it shouldn't be too hot). Stir some more, just to mix everything one final time, then grab some black construction paper, and start painting. For the brightest results, go over your designs a few times.

Lay your paper flat to dry someplace safe and warm while the water evaporates. We left ours on top of the radiators overnight, and in the morning...

Jack Frost had been by for a visit!

We definitely aren't going to win any art awards any time soon, but we had a lot of fun with this easy, wintery craft. Next time, we'll try adding tempera paint and try painting on white paper for a colorful glittery effect.
Have you ever crafted with salt crystals? Tell us about it!
Baby A. and I decided to make a few tweaks to make this activity a little more toddler friendly, and did a little salt crystal painting one afternoon earlier this week. This craft rules because it's virtually mess free and because you are guaranteed to already have everything you need for it somewhere in your house.

The first step is to mix a salt solution. The perfect ratio is about one part salt to four parts water; we found that three tablespoons of salt in a 1/4 cup of water worked best for us. (We used table salt -- you can also use Epsom salts or borax crystals, though neither of those are safe for eating).
Add the salt to the water a little bit at a time, stirring to dissolve it as completely as possible in between. When the salt stops dissolving in the solution (crystals will be floating on top of the water and will remain at the bottom of your cup), nuke it in the microwave for about 20-30 seconds (it shouldn't be too hot). Stir some more, just to mix everything one final time, then grab some black construction paper, and start painting. For the brightest results, go over your designs a few times.

Lay your paper flat to dry someplace safe and warm while the water evaporates. We left ours on top of the radiators overnight, and in the morning...

Jack Frost had been by for a visit!

![]() |
| Baby A's "snowflake." |
We definitely aren't going to win any art awards any time soon, but we had a lot of fun with this easy, wintery craft. Next time, we'll try adding tempera paint and try painting on white paper for a colorful glittery effect.
Have you ever crafted with salt crystals? Tell us about it!
Subscribe to:
Posts (Atom)
Blog Design by Nudge Media Design | Powered by Blogger